
GoPro Hero Session User Manual ─ Comprehensive Guide
Welcome! This comprehensive guide unlocks your GoPro Hero Session’s potential, offering detailed instructions and tips for optimal performance and enjoyment.
The GoPro Hero Session represents a significant leap in compact action camera technology, designed for simplicity and durability. This guide serves as your companion, unlocking the full potential of this powerful, yet incredibly user-friendly device. Unlike larger GoPro models, the Hero Session boasts a streamlined, waterproof design – eliminating the need for an external housing for many applications.
Its intuitive one-button operation makes capturing stunning photos and videos effortless, even in challenging environments. This manual will detail everything from initial setup and connecting to the GoPro App, to mastering advanced camera settings and troubleshooting common issues. Prepare to document and share your adventures with unparalleled ease and quality. Explore the world of action capture with your new GoPro Hero Session!
Unboxing and Component Overview
Your GoPro Hero Session package should contain the following components: the Hero Session camera itself, a standard housing (pre-installed), a curved adhesive mount, a flat adhesive mount, a USB charging cable, and this user manual. Carefully inspect all items for any signs of damage during shipping.
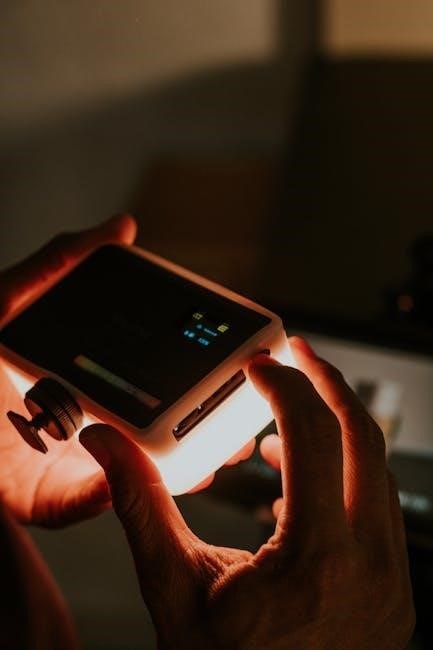
The Hero Session’s compact design integrates directly into its housing, simplifying setup. The single button on top controls all camera functions – power, start/stop recording, and mode switching. Familiarize yourself with the camera’s exterior, noting the USB port for charging and data transfer. Ensure you download the GoPro App for expanded control and settings access. Retain the packaging for potential warranty claims or future transport.
Charging the GoPro Hero Session
To charge your Hero Session, connect the provided USB cable to the camera’s USB port and a USB power source – a computer, wall adapter, or portable power bank. A red LED indicator will illuminate, signifying that charging is in progress. The camera continues to operate during charging, though recording performance may be limited.

Charging time varies depending on the power source, but a full charge typically takes approximately 2-3 hours. The LED will turn off when charging is complete. GoPro recommends using a 5V/1A USB power adapter for optimal charging speed. Avoid using damaged USB cables or power adapters. Regularly check the charging port for debris. A fully charged Hero Session provides ample recording time for your adventures.
Powering On and Off
Powering on your GoPro Hero Session is simple: press and hold the single button located on top of the camera for a few seconds until the camera vibrates and the status lights illuminate. The camera will automatically enter recording mode, ready to capture your experiences. To power off, repeat the process – press and hold the button until the camera vibrates again and the lights turn off.
A short press of the button while the camera is on will cycle through the available camera modes. Ensure the camera is fully charged before extended use. If the camera doesn’t respond, try a different USB cable or power source. Proper power management extends battery life during your adventures.

Setting Up Your GoPro Hero Session
Unlock full functionality! Connect your HERO Session to the GoPro App or remote for complete settings access and seamless control over your camera.
Connecting to the GoPro App
Seamlessly pair your GoPro Hero Session with the GoPro App to unlock a world of control and customization. Begin by downloading the GoPro App from your device’s app store (iOS or Android). Once installed, launch the app and ensure Bluetooth is enabled on your smartphone or tablet.
Power on your Hero Session. Within the app, follow the on-screen prompts to add a new camera. The app will automatically search for nearby GoPro cameras. Select your Hero Session from the list of available devices.
You may be prompted to enter a PIN displayed on the camera’s screen into the app to confirm pairing. Once connected, the app provides access to all camera settings, live preview, remote control functionality, and easy file transfer. Automatic update notifications will also appear within the app, ensuring your camera always has the latest firmware.
Pairing with the GoPro Remote
Effortlessly control your GoPro Hero Session from a distance using the GoPro Remote. First, ensure your remote has sufficient battery power. Power on your Hero Session. Navigate to the camera’s settings menu using the camera buttons – repeatedly press the Info/Wireless button until the remote control icon appears.
Select the remote control option, and the camera will begin searching for available remotes. Simultaneously, press and hold the shutter button on your GoPro Remote until the remote’s screen illuminates and displays a pairing indicator.
Once the camera detects the remote, it will automatically pair. A confirmation message will appear on both the camera and remote screens. Now you can use the remote to start/stop recording, change modes, and adjust settings without physically touching the camera.
Initial Camera Settings Configuration
Personalize your GoPro Hero Session for optimal performance right from the start. After powering on, access the settings menu via the camera’s buttons – repeatedly pressing Info/Wireless will navigate you there. Begin by setting the correct date and time for accurate timestamping of your footage.
Next, configure your preferred video resolution and frame rate. Consider 1080p at 60fps for smooth, versatile footage, or 4K for maximum detail. Adjust the field of view (FOV) to Wide, Linear, or Narrow based on your shooting style.
Explore the available language options and ensure your preferred language is selected. Finally, verify the memory card is properly formatted for reliable recording. Utilizing the GoPro App provides access to all settings for easier configuration.

Understanding Camera Modes
Explore versatile shooting options! The Hero Session excels in Video, Photo, TimeLapse, and Night Lapse modes, offering creative control for diverse capture scenarios.
Video Mode: Resolutions and Frame Rates
Capture stunning video with customizable settings! The GoPro Hero Session’s Video Mode provides a range of resolutions and frame rates to suit your needs. You can record in 1080p at up to 60 frames per second for smooth, detailed footage, or opt for 720p at various frame rates for different effects.
Higher frame rates, like 60fps, are ideal for capturing fast-action sports and creating smooth slow-motion playback. Lower frame rates, such as 30fps, are suitable for general recording and conserving storage space. The Hero Session also supports a super-wide field of view, maximizing the captured scene. Experiment with different combinations to achieve your desired look and feel. Remember to consider the available storage space when selecting higher resolutions and frame rates, as these will consume more memory.
Photo Mode: Megapixels and Burst Settings
Unlock photographic potential with versatile settings! The GoPro Hero Session captures high-quality still images utilizing an 8-megapixel sensor. This allows for detailed photos suitable for sharing online or printing. Within Photo Mode, you can adjust various settings to optimize image capture for different scenarios.
The Burst setting is particularly useful for action photography, enabling you to capture a rapid sequence of photos with a single press of the shutter button. This increases your chances of capturing the perfect moment. Experiment with different burst intervals to find what works best for your shooting style. Remember that using burst mode will consume storage space more quickly. Explore the settings to tailor your photo experience!
TimeLapse and Night Lapse Modes
Capture the passage of time creatively! The GoPro Hero Session offers both TimeLapse and Night Lapse modes, allowing you to condense long durations into stunning, shareable videos. TimeLapse mode captures photos at set intervals, automatically stitching them together into a video showcasing gradual changes – perfect for landscapes or events.
Night Lapse takes this concept into the darkness, capturing photos over extended periods for mesmerizing views of the night sky or cityscapes. Adjust the capture interval based on the desired effect; shorter intervals create faster-paced videos, while longer intervals showcase slower changes. Remember to secure your GoPro for long exposures during Night Lapse to ensure sharp, stable footage.
Advanced Camera Settings

Unlock pro-level control! Dive into settings like ISO, white balance, and Protune to fine-tune image quality and achieve your desired creative vision.

Adjusting ISO Levels
ISO controls your camera’s sensitivity to light, directly impacting image brightness and noise levels. Lower ISO settings (like 100 or 200) are ideal for bright conditions, delivering cleaner, sharper footage with minimal grain. However, in low-light environments, increasing the ISO (up to 6400) becomes necessary to capture a usable image.
Be mindful that higher ISO values introduce more digital noise, potentially reducing image clarity. The GoPro Hero Session’s Protune settings allow precise ISO adjustments. Experiment to find the optimal balance between brightness and noise for your specific shooting scenario. Consider using a lower ISO whenever possible to maintain the highest possible image quality. Understanding ISO is crucial for achieving professional-looking results in diverse lighting conditions.
White Balance Control
White balance ensures accurate color representation in your videos and photos by adjusting for different lighting conditions. Incorrect white balance can result in unwanted color casts – images appearing too blue, yellow, or green. The GoPro Hero Session offers several white balance presets, including Auto, Daylight, Cloudy, Tungsten, and Fluorescent.
“Auto” attempts to determine the correct setting, but manual control via Protune provides superior results. For example, use “Daylight” on a sunny day or “Tungsten” under incandescent lights. Custom white balance allows you to set a precise reference point for accurate colors. Experiment with different settings to achieve natural-looking footage, especially when shooting in challenging or mixed lighting environments. Proper white balance is key to vibrant and realistic imagery.
Protune Settings: Color Profile and Sharpness
Protune unlocks advanced control over image quality. The Color Profile setting lets you choose between GoPro Color – vibrant and ready-to-share – and Flat Color, ideal for post-production color grading. Flat Color captures more dynamic range, offering greater flexibility in editing.
Sharpness adjusts the level of detail in your footage. Lower settings produce a softer image, while higher settings enhance detail but can introduce artifacts. Experiment to find a balance that suits your preference and intended use. Protune also allows control over contrast, saturation, and ISO limits. Mastering these settings enables professional-looking results, tailored to your creative vision and post-processing workflow.

Using the GoPro Hero Session
Maximize your adventures! Explore diverse mounting options, effortlessly transfer files, and ensure peak performance with regular firmware updates via the GoPro App.
Mounting Options and Accessories
Unleash the full potential of your GoPro Hero Session with its incredibly versatile mounting system! A wide array of accessories allows for capturing unique perspectives in any scenario. Explore standard mounts for helmets, handlebars, and surfboards, ensuring secure attachment during high-intensity activities.
Consider adhesive mounts for discreet placement on various surfaces, or utilize the magnetic swivel clip for quick adjustments and dynamic angles. Don’t forget about the floating hand grip, perfect for water sports, and the bite mount for hands-free recording.
GoPro offers extension poles for expanded reach and selfie sticks for immersive shots. Remember to explore third-party accessories to further customize your setup and tailor it to your specific needs. Proper mounting ensures stable footage and protects your valuable camera!
Transferring Files to Your Computer
Seamlessly transfer your incredible GoPro Hero Session footage to your computer for editing and sharing! The simplest method involves connecting your GoPro directly via the USB cable. Your computer will recognize the camera as a removable drive, allowing you to drag and drop files effortlessly.
Alternatively, utilize the GoPro App for wireless transfer. Ensure both your GoPro and computer are connected to the same Wi-Fi network. Within the app, select the desired files and initiate the transfer process.
For larger transfers, consider using an SD card reader for faster speeds. Remember to safely eject your GoPro or SD card from your computer after the transfer is complete to prevent data corruption. Back up your files regularly to safeguard your precious memories!
Updating Firmware via the GoPro App
Keep your GoPro Hero Session performing at its best with regular firmware updates! The GoPro App simplifies this process. First, ensure your camera is powered on and connected to a stable Wi-Fi network. Launch the GoPro App on your smartphone or tablet and pair it with your Hero Session.
The app will automatically check for available updates. If an update is found, a notification will appear. Select “Update” and follow the on-screen instructions. Crucially, do not power off your camera or disconnect it during the update process.
A progress bar will indicate the update’s status. Once complete, your GoPro will restart. Firmware updates often include bug fixes, performance improvements, and new features, enhancing your overall experience.

Troubleshooting Common Issues
Resolve typical problems like power failures, connectivity glitches, or corrupted files with our guide, ensuring a smooth and uninterrupted GoPro Hero Session experience.
Camera Not Powering On
If your GoPro Hero Session fails to power on, begin with the basics: ensure the battery is adequately charged. Connect the camera to a reliable power source using the provided USB cable and allow sufficient charging time. A completely depleted battery may take a while to respond.
Next, verify the power button functionality. Press and hold the power button for a few seconds; a brief press might not suffice. If there’s still no response, attempt a reset. While the Hero Session doesn’t have a traditional reset button, disconnecting and reconnecting the battery (if possible with your model) can sometimes resolve the issue.
Consider environmental factors. Extreme temperatures can affect battery performance. If the camera has been exposed to very cold or hot conditions, allow it to return to a moderate temperature before attempting to power it on. If these steps fail, consult the GoPro support website or contact customer service for further assistance, as it may indicate a hardware malfunction.
Connectivity Problems
Experiencing difficulty connecting your GoPro Hero Session? First, ensure Bluetooth is enabled on both your GoPro and your smartphone or GoPro Remote. Verify the devices are within range – typically within 30 feet (10 meters) for a stable connection; Restarting both devices is often a surprisingly effective troubleshooting step.
Within the GoPro App, confirm the Hero Session is in pairing mode. Repeatedly pressing the Info/Wireless button on the camera cycles through connection options. Select the appropriate pairing mode and follow the on-screen instructions within the app.
If pairing fails, try “forgetting” the GoPro in your phone’s Bluetooth settings and then re-pairing. Ensure no other devices are interfering with the Bluetooth signal. For Wi-Fi connectivity, double-check your network credentials within the app and confirm a strong Wi-Fi signal. If issues persist, consult GoPro’s support resources.
File Corruption and Recovery
Encountered corrupted files on your GoPro Hero Session? This can occur due to interrupted recordings, low battery during writing, or a faulty microSD card. First, try playing the file on multiple devices – sometimes a specific player has compatibility issues.
If the file remains unplayable, consider using file recovery software designed for SD cards. Several options are available online, both free and paid. Before using any software, safely remove the microSD card from your GoPro and connect it to your computer via a card reader.
Preventative measures include using a high-quality, name-brand microSD card, ensuring sufficient battery life during recording, and properly ejecting the card after use. Regularly backing up your GoPro footage to a computer or cloud storage is also highly recommended to mitigate data loss.

Specifications and Warranty Information
Explore detailed technical specs and crucial warranty details for your HERO Session, ensuring peace of mind and understanding product limitations.
HERO Session Technical Specifications
The GoPro HERO Session boasts impressive capabilities within its compact design. It features an 8MP sensor, capturing high-quality images and video. Video resolutions include 1080p at up to 60 frames per second, delivering smooth and detailed footage. The camera offers a super-wide field of view, ideal for immersive action shots.
Its waterproof housing allows for underwater recording down to 33 feet (10 meters) without additional protection. Connectivity options include Wi-Fi and Bluetooth, enabling seamless integration with the GoPro App and remote control. The HERO Session supports microSD cards up to 64GB for ample storage. Battery life is optimized for extended shooting sessions. Dimensions are remarkably small, making it incredibly portable. This camera is designed for simplicity and durability, perfect for capturing life’s adventures.
Warranty Claims and Support
GoPro stands behind the quality of the HERO Session with a limited warranty covering defects in materials and workmanship. To initiate a warranty claim, visit the official GoPro website and follow the online instructions. You’ll likely need proof of purchase and a detailed description of the issue.
GoPro’s support resources include a comprehensive online help center with FAQs, troubleshooting guides, and user manuals available for download as PDFs. Direct support is also available via phone or email, offering assistance from knowledgeable representatives. Remember to register your GoPro to ensure efficient warranty service. Explore the GoPro community forums for peer-to-peer support and shared experiences. Maintaining your proof of purchase is crucial for a smooth claim process.
Safety Precautions
Prioritize safety when using your GoPro HERO Session. Avoid exposing the camera to extreme temperatures, as this can damage the battery and internal components. Do not attempt to disassemble the device; this will void the warranty and could pose a safety risk.
When mounting, ensure secure attachment to prevent accidental drops. Be mindful of your surroundings and avoid filming in hazardous environments. Handle the battery with care, avoiding punctures or exposure to water. Regularly check for firmware updates via the GoPro App to benefit from the latest safety enhancements. Always follow local laws and regulations regarding filming in public spaces. Responsible use ensures both your safety and the longevity of your GoPro.