Polycom Phone User Manual: A Comprehensive Guide
This manual details Polycom VVX series phones – 300, 400, and 500 – alongside models like the CX100.
It covers setup, features, troubleshooting, and compatibility with Poly UC Software, ensuring optimal performance.
Polycom phones represent a leading standard in business communications, renowned for their clarity, reliability, and feature-rich capabilities. This guide focuses on the VVX series – encompassing the VVX 300, 400, and 500 models – designed to cater to diverse organizational needs, from basic telephony to advanced unified communications.
These phones aren’t simply devices for making and receiving calls; they are integral components of a comprehensive communication ecosystem. Polycom integrates seamlessly with various platforms, including Poly UC Software, enhancing collaboration and productivity. Beyond the core VVX series, specialized models like the CX100 conference phone offer dedicated solutions for group calls. Understanding the nuances of each model, and compatible accessories like the GAR5 resin, is crucial for maximizing your investment; This manual will provide a detailed overview, empowering you to effectively utilize your Polycom phone system.
Understanding Polycom VVX Series
The Polycom VVX series is structured to provide scalable communication solutions, offering three distinct tiers: the VVX 300, 400, and 500. The VVX 300 series serves as a foundational option, ideal for users requiring essential call features. Stepping up, the VVX 400 series introduces mid-range capabilities, enhancing functionality for more demanding users.
Finally, the VVX 500 series delivers peak performance and advanced options, catering to executives and power users. Each series supports Poly UC Software, enabling integration with unified communications platforms. A crucial aspect of understanding the VVX series involves recognizing supported phone models and their corresponding part numbers, as detailed in Polycom’s documentation. This tiered approach allows organizations to select the optimal phone solution based on specific user roles and budgetary constraints, ensuring a tailored and efficient communication infrastructure.
VVX 300 Series: Basic Features
The Polycom VVX 300 series represents an entry-level yet robust communication solution, providing essential features for everyday office use. These phones typically include core functionalities such as high-definition voice quality, speakerphone capabilities, and a user-friendly interface. Users benefit from standard call features like hold, transfer, and mute.
While lacking the advanced functionalities of higher-tier models, the VVX 300 series offers reliable performance for basic communication needs. It’s designed for straightforward deployment and management, making it a cost-effective choice for organizations prioritizing essential features. Compatibility with Poly UC Software expands its capabilities, allowing integration with broader unified communications systems. The VVX 300 series provides a solid foundation for businesses seeking a dependable and affordable VoIP phone solution.
VVX 400 Series: Mid-Range Capabilities
Building upon the foundation of the VVX 300 series, the VVX 400 series introduces a range of enhanced features for more demanding users. These phones offer a larger display, providing more space for information and easier navigation. Improved audio quality and enhanced speakerphone performance deliver a superior calling experience.
The VVX 400 series typically includes support for additional functionalities like Bluetooth connectivity for headset use and enhanced integration with Poly UC Software. This allows for features such as video calling and instant messaging. It’s a versatile option suitable for users requiring a balance between functionality and cost-effectiveness. The series provides a step up in performance and features, catering to professionals needing more advanced communication tools without the premium price of the VVX 500 series.
VVX 500 Series: Performance and Advanced Options
The VVX 500 series represents Polycom’s high-performance business media phone offering, designed for power users and executives. These phones boast the largest displays within the VVX portfolio, coupled with superior audio quality and a customizable user interface. They deliver an immersive communication experience, supporting high-resolution video and advanced applications.
Key features include enhanced processing power for smooth application performance, Gigabit Ethernet connectivity for fast network speeds, and extensive integration with Poly UC Software. The VVX 500 series often supports advanced functionalities like dual Gigabit Ethernet ports, and enhanced security features. It’s ideal for users who require maximum productivity and a rich set of communication tools, offering a premium experience for demanding business environments.
Setting Up Your Polycom Phone
Initial setup involves activation, network connection, and user account configuration. Customizing settings ensures a personalized experience, optimizing the phone for individual needs and preferences.
Initial Phone Setup and Activation
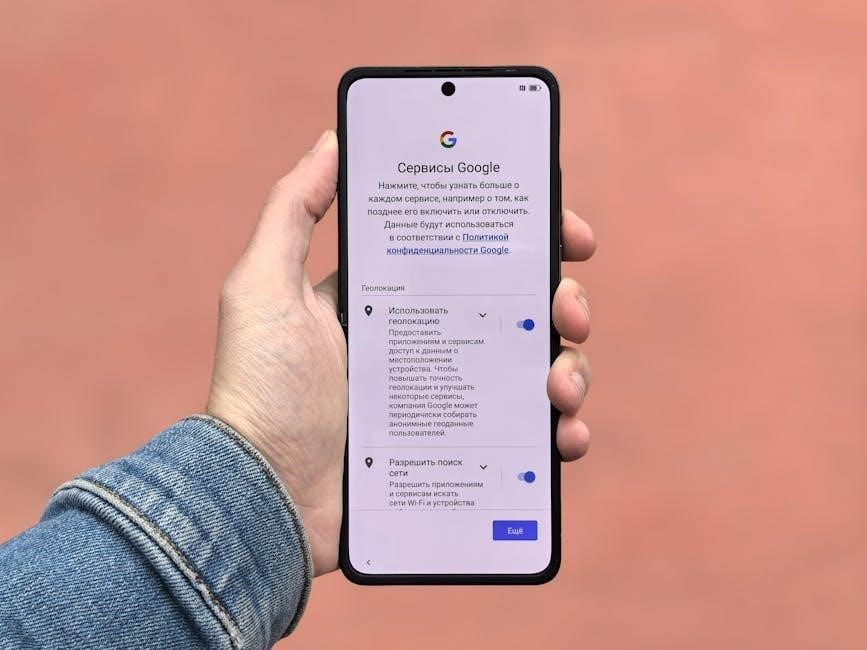
Upon receiving your Polycom phone, the first step is physical setup – connecting the power adapter and network cable. Ensure a stable network connection before proceeding. Activation typically involves accessing the phone’s web interface via a computer on the same network, using the phone’s IP address.
You’ll likely need your user credentials provided by your system administrator. This process registers the phone with the call control server. The initial configuration often includes setting the date and time, and selecting the appropriate language. Some models may require a provisioning server for automated setup. Following activation, the phone will download its configuration file, displaying the user’s extension and associated features. Verify successful registration by making a test call. If issues arise, consult your IT department or the Polycom support resources.
Connecting to the Network
Establishing a network connection is crucial for your Polycom phone to function. Typically, this is achieved via a standard Ethernet cable connected to your local area network (LAN). Ensure the cable is securely plugged into both the phone and the network port. For wireless connectivity, some Polycom models support Wi-Fi, requiring configuration through the phone’s web interface with your network’s SSID and password.
The phone may obtain an IP address automatically via DHCP, or you might need to configure a static IP address, subnet mask, and gateway, as provided by your network administrator. Verify connectivity by checking the phone’s network status in the settings menu. A successful connection is indicated by a stable IP address and access to network services. Troubleshooting network issues may involve checking the cable, router, or contacting your IT support team.
Configuring User Accounts
Proper user account configuration is essential for personalized phone functionality. This process usually involves associating your phone with an extension number and a password provided by your system administrator. Access the phone’s settings menu, often through a web browser using the phone’s IP address, to enter this information. You may need to log in with a default administrator password initially.
Once logged in, navigate to the user accounts section and create or modify your profile. Ensure the extension number matches your telephony system’s configuration. Some systems support multiple accounts on a single phone, allowing for hot-desking or shared usage. Verify the account settings by making a test call. If issues arise, double-check the extension number and password, or contact your IT department for assistance.
Customizing Phone Settings
Polycom phones offer extensive customization options to tailor the user experience. Access these settings via the phone’s web interface, typically by entering its IP address into a web browser. Here, you can adjust display settings like brightness, contrast, and screen saver duration. Personalize ringtones and volume levels for incoming calls to suit your preferences.
Further customization includes configuring softkeys – the programmable buttons around the display – to access frequently used features like speed dial or call forwarding. You can also adjust date and time settings, and network preferences. Explore options for language selection and regional formatting. Remember to save your changes after each adjustment. Incorrect settings can impact functionality, so proceed cautiously and consult your system administrator if needed.
Using Your Polycom Phone
This section guides you through making and receiving calls, utilizing features like hold, transfer, and conferencing, accessing voicemail, and managing your contact list efficiently.
Making and Receiving Calls
To initiate a call, simply dial the desired number using the keypad and press the send button. The Polycom phone supports speed dialing, allowing quick access to frequently called numbers. Incoming calls are indicated by a visual alert and audible ringtone; answer by pressing the answer key or the speakerphone button for hands-free operation.
During a call, you can adjust the volume using the volume control keys. Muting the microphone is possible with the mute button, ensuring privacy when needed. The phone displays caller ID information, providing details about the person calling. For clarity, ensure your network connection is stable for optimal call quality. Understanding these basic functions will enhance your communication experience with your Polycom phone, streamlining both outgoing and incoming interactions.
Call Features: Hold, Transfer, Conference
Placing a call on hold is easily achieved using the dedicated ‘Hold’ button, allowing you to temporarily pause the conversation without disconnecting. To transfer a call, press the ‘Transfer’ button, dial the extension or number of the recipient, and then complete the transfer. This feature facilitates seamless redirection to the appropriate party.
Initiating a conference call involves adding multiple participants to a single call. Begin by placing the current call on hold, then add the additional parties one by one. Once all participants are connected, activate the conference feature to establish a multi-party conversation. These features enhance collaboration and productivity, streamlining communication workflows within your organization. Proper utilization of these tools optimizes call handling efficiency.
Voicemail Access and Management
Accessing your voicemail is straightforward; typically, a dedicated voicemail key on your Polycom phone initiates the process. You’ll likely be prompted to enter your password for security. Once authenticated, a menu system allows you to listen to new messages, review saved messages, and manage your voicemail box.
Voicemail management includes options to delete messages, save important messages, and adjust notification settings. You can often customize your greeting to provide callers with specific instructions. Regularly checking and organizing your voicemail ensures you don’t miss critical information. Familiarize yourself with the specific voicemail system features offered by your service provider for optimal usage and efficient message handling. Efficient voicemail management is key to staying connected.
Contact List Management
Maintaining a well-organized contact list on your Polycom phone streamlines your communication. Most VVX series phones allow you to add new contacts directly from the phone’s interface, inputting names and corresponding phone numbers. You can typically categorize contacts into groups for easier searching and calling.
Editing and deleting contacts is also usually supported, ensuring your list remains current and accurate. Some models may offer synchronization with external directory services or cloud-based contact platforms. Regularly updating your contact list prevents dialing errors and improves overall efficiency. Explore the phone’s settings to discover advanced features like speed dial assignments and custom ringtones for specific contacts, enhancing your calling experience.
Advanced Features and Troubleshooting
Explore Poly UC Software compatibility, supported phone models, and part numbers. This section details solutions for common issues and guides you through factory resetting your Polycom phone.
Poly UC Software Compatibility
Poly UC Software enhances Polycom phone functionality, integrating voice communications with unified communications platforms. The software supports a range of Polycom VVX models, including the 300, 400, and 500 series, providing features like presence, instant messaging, and video conferencing integration.
Compatibility varies depending on the specific Poly UC Software version and the phone model. Refer to the official Polycom documentation for a detailed list of supported phones and software versions. Ensuring compatibility is crucial for optimal performance and access to all available features. The table listing product names, model names, and part numbers is a vital resource for verifying support. Regularly updating both the phone firmware and Poly UC Software is recommended to maintain compatibility and benefit from the latest enhancements and security updates.
Understanding Supported Phone Models & Part Numbers
Identifying your Polycom phone model and its corresponding part number is essential for accessing the correct documentation, firmware updates, and support resources. Polycom offers a diverse portfolio, including the VVX 300, 400, and 500 series, each catering to different business needs. The CX100 conference phone is also a key model.
Part numbers are crucial for ordering replacements or compatible accessories. Poly provides a comprehensive table listing product names, model names, and their associated part numbers to facilitate accurate identification. This information is vital when contacting Poly support or purchasing accessories like the GAR5 resin for specific models. Understanding these details ensures you receive the correct components and maintain optimal phone functionality. Always refer to official Polycom resources for the most up-to-date information.
Troubleshooting Common Issues
Encountering issues with your Polycom phone is common, but many can be resolved with simple troubleshooting steps. Frequent problems include network connectivity issues, audio quality concerns, and difficulties with call features. First, verify your network connection and ensure the phone receives a valid IP address. Check the handset cord and headset connections for secure placement.
If experiencing audio problems, test with a different headset or handset. For call feature malfunctions, review your phone’s configuration settings. If problems persist, a factory reset – while drastic – can often restore functionality. Remember to back up any custom settings before performing a reset. Polycom’s support website offers extensive troubleshooting guides and FAQs. Documenting the specific issue and any error messages will expedite support assistance.
Factory Resetting Your Polycom Phone
A factory reset restores your Polycom phone to its original default settings, resolving many persistent software issues. However, this process erases all personalized configurations, including user accounts, call logs, and custom settings. Before proceeding, attempt all other troubleshooting steps. To initiate a factory reset, access the phone’s settings menu – typically through the web interface or a specific key combination on the device itself.
The exact procedure varies by model (VVX 300, 400, or 500 series), so consult your specific phone’s documentation. Confirm the reset action, as it is irreversible without specialized tools. After the reset, you’ll need to reconfigure the phone with your network settings and user account details. Backing up your configuration before resetting is highly recommended, if possible, to streamline the restoration process.
Specific Polycom Models
This section details the CX100 conference phone, a USB-connected device without a keypad, and discusses the GAR5 resin compatibility for related accessories.
CX100 Conference Phone Overview
The Polycom CX100 is a dedicated conference phone designed for small to medium-sized meeting rooms. Notably, it lacks a traditional keypad, operating primarily through connection to a PC via USB. This design simplifies its functionality, focusing solely on high-quality audio conferencing. It doesn’t function as a standalone phone with direct dialing capabilities.
Its core strength lies in its ability to deliver clear voice pickup and playback, enhancing collaboration during virtual meetings. The CX100 integrates seamlessly with popular unified communications platforms, providing a reliable audio solution. It’s an excellent choice for scenarios where a simple, effective conference phone is needed without the complexities of a full-featured desk phone.
Consider the CX100 when a dedicated conferencing solution is required, and PC-based meeting platforms are the primary means of communication. It’s a streamlined option for focused audio experiences.
GAR5 Resin Compatibility (Related Accessory)
While seemingly unrelated to Polycom phones directly, the GAR5 Resin – specifically the New MAS Deep Pour Resin – appears as a listed item alongside Polycom products in certain sales contexts. Offered in 6 or 12-gallon quantities, it’s currently available at a significant discount in Kailua. This suggests a potential bundled sale or a vendor offering both Polycom solutions and resin products.
The connection isn’t functional compatibility with the phones themselves; rather, it’s a retail availability overlap. The resin is used for casting and art projects, completely separate from telephony.
Therefore, users shouldn’t expect any integration or operational link between Polycom devices and the GAR5 Resin. Its presence in listings alongside Polycom phones is purely a matter of vendor inventory and promotional offers, not a technical relationship.
Maintenance and Support
Regular cleaning extends phone lifespan; additional support resources are readily available online and through Poly’s official channels, ensuring continued optimal functionality.
Cleaning and Care
Maintaining your Polycom phone’s physical condition is crucial for its longevity and optimal performance. Regularly wipe down the phone’s surfaces with a soft, slightly damp cloth to remove dust, fingerprints, and other debris. Avoid using abrasive cleaners, solvents, or excessive moisture, as these can damage the plastic casing or sensitive electronic components.
For stubborn marks, a mild soap solution can be used, but ensure the cloth is only lightly dampened and that no liquid enters the phone’s openings. Pay particular attention to the handset and keypad, as these areas accumulate the most contact with skin oils and germs. Disconnect the phone from the power source before cleaning to prevent any electrical hazards. Proper cleaning not only enhances the phone’s appearance but also contributes to a hygienic work environment.
Where to Find Additional Support
Should you encounter issues beyond this manual, several resources are available for comprehensive Polycom support. The Poly website (www.poly.com) offers an extensive knowledge base, frequently asked questions, and downloadable resources, including detailed product documentation and software updates. You can also access Poly’s community forums to connect with other users and share troubleshooting tips.
For direct assistance, Poly provides various support channels, including phone support and online chat. Depending on your region and support agreement, these options may have associated costs. Additionally, your IT administrator or service provider may offer internal support for Polycom phones within your organization. Remember to have your phone’s model number and any relevant error messages readily available when seeking assistance to expedite the support process.