Mamiya 645 Instruction Manual: A Comprehensive Guide
Delve into the world of medium format photography! This manual offers detailed guidance, covering operation, features, and troubleshooting for Mamiya 645 systems.
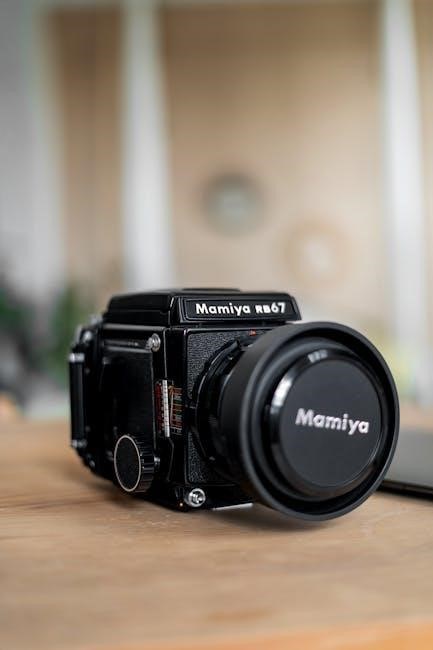
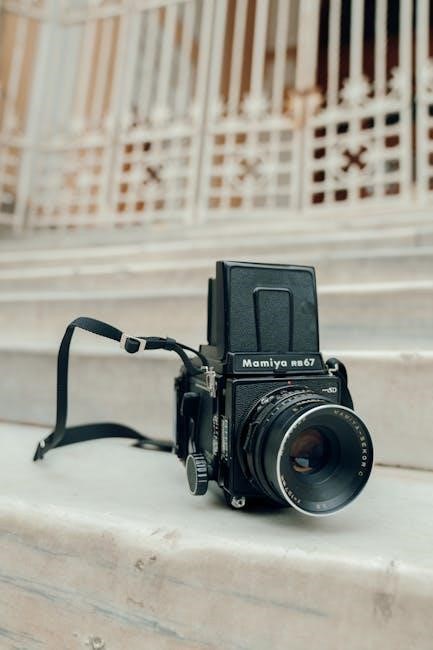
The Mamiya 645 system represents a pinnacle of medium format photography, renowned for its exceptional image quality and modular design. Introduced initially in 1975, it quickly gained favor among professionals and serious enthusiasts. This system’s core strength lies in its versatility, achieved through interchangeable lenses and film backs, allowing photographers to adapt to diverse shooting scenarios.
Understanding the system’s components and their interplay is crucial. Forums and online resources, like those discussing film availability and even access to films like Gaspar Noe’s “Love”, highlight the enduring interest in this format. Manuals, parts catalogs, and user guides – often found as downloadable PDFs – are essential for mastering the Mamiya 645’s capabilities.
Understanding Mamiya 645 Camera Models
The Mamiya 645 system evolved through several iterations, each offering unique features. Early models, like the original 645, were fully mechanical, while later versions, such as the 645 Super and 645 AF, incorporated electronic advancements like autofocus and automated exposure. Identifying your specific model is the first step to utilizing the correct resources.
Online forums frequently discuss model-specific issues, like prism finder functionality (Mamiya 645 Super AE Prism Finder N) and parts availability (Mamiya M645 Parts Catalog). Understanding these differences – from film advance mechanisms to metering systems – is vital for proper operation and maintenance, ensuring optimal performance from your Mamiya 645.
Key Features and Benefits of the Mamiya 645
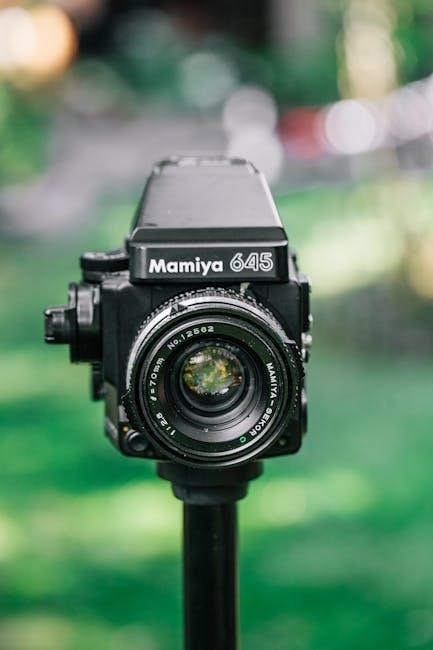
The Mamiya 645 system delivers exceptional image quality through its medium format 6×4.5cm film size, offering a balance between detail and practicality. Interchangeable lenses provide versatility, catering to diverse photographic needs. The system’s robust build quality ensures durability, making it a reliable tool for professionals and enthusiasts.
Benefits include a shallower depth of field for artistic portraits and a wider field of view compared to smaller formats. While some features, like accessing certain content, may require community registration (as noted in forum discussions), the core functionality remains accessible. The system’s modularity allows for upgrades and customization.
Camera Components and Their Functions
Explore the Mamiya 645’s anatomy! Understand the interplay of the body, prism finder, lenses, and backs – essential for optimal performance and control.
Body and Film Advance Mechanism
The Mamiya 645 body is the core of the system, housing the film transport and essential controls. Smooth, reliable film advance is crucial for consistent results. The crank handle operates a gear system, carefully moving film across the exposure frame.
Pay attention to the film counter, accurately displaying the number of exposures taken. Proper film loading and unloading, detailed later, are vital to avoid jams or damage. The body also incorporates the shutter speed dial and other key operational elements. Regular inspection ensures optimal functionality, contributing to a seamless shooting experience;
Prism Finder and Focusing Screen
The Mamiya 645 prism finder provides a bright, clear, and upright image for accurate composition and focusing. It’s a crucial component for visual assessment before each shot. Interchangeable focusing screens offer various focusing aids, like split-image or microprism collars, enhancing precision.
Clean the finder window regularly to maintain optimal clarity. Proper alignment is essential for accurate viewing. The finder also displays important exposure information, assisting in setting correct parameters. Understanding the focusing screen’s features significantly improves focusing speed and accuracy, leading to sharper images.
Interchangeable Lenses: Overview
Mamiya 645’s strength lies in its versatile lens system. A wide range of lenses, from wide-angle to telephoto, caters to diverse photographic needs. These lenses are renowned for their sharpness and optical quality, delivering exceptional results. Lens compatibility is key; ensure lenses are designed for the Mamiya 645 bayonet mount.
Proper lens mounting and demounting are crucial to avoid damage. Regularly check for any signs of fungus or dust. Understanding each lens’s characteristics – focal length, maximum aperture – is vital for creative control. Investing in quality lenses unlocks the full potential of the Mamiya 645 system.

Loading and Unloading Film
Master the art of film handling! This section details proper film loading and unloading techniques for Mamiya 645 cameras, ensuring optimal results.
Film Types Compatible with Mamiya 645
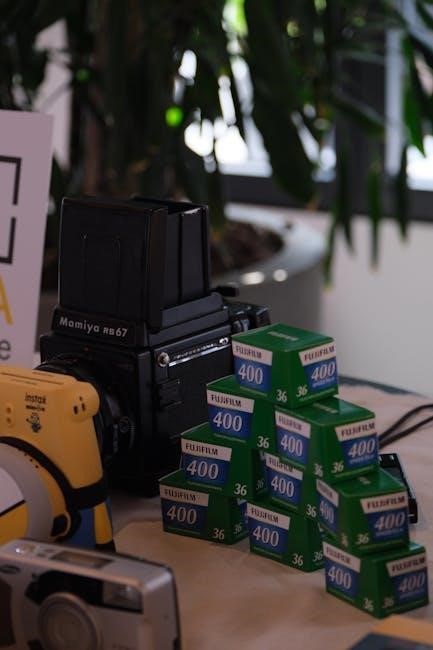
The Mamiya 645 system is renowned for its versatility with various film types, offering photographers a broad palette for creative expression. Primarily, it accommodates 120 medium format film, delivering stunning image quality. Specifically, both 6×4.5cm and 6x7cm formats are supported, depending on the back utilized.
Color negative, color slide (positive), and black and white films are all compatible. ISO ranges typically span from 25 to 3200, though experimentation with other sensitivities is possible. It’s crucial to select a film appropriate for the intended shooting conditions and desired aesthetic. Always ensure the film is fresh and properly stored to prevent defects and maintain optimal performance within your Mamiya 645.
Step-by-Step Film Loading Procedure
Loading film into the Mamiya 645 requires precision. First, open the camera back and insert the film canister into the left-side holder. Next, pull the film leader across the film gate and engage it with the take-up spool. Gently advance the film using the crank, ensuring it catches securely.
Continue advancing, observing the rewind knob turning to confirm proper film transport. Close the camera back firmly. The frame counter will automatically begin registering exposures. Always test with a few blank frames to ensure correct loading before shooting important subjects. Careful loading prevents damage and ensures consistent results.
Proper Film Unloading Techniques
Unloading film from your Mamiya 645 is straightforward but requires care. First, fully advance the film past the end of the roll, typically indicated by reduced resistance on the film advance crank. Then, open the camera back. Gently lift the film canister and carefully remove the film from the take-up spool.
Avoid exposing the film to direct sunlight during removal. Rewind the film completely back into the canister before opening it for development. Proper unloading prevents light leaks and ensures your images remain pristine. Discard used film canisters responsibly.

Exposure Settings and Metering
Master light control! Learn to adjust aperture and shutter speed, understand TTL and center-weighted metering, and set ISO for optimal results.
Aperture and Shutter Speed Control
Aperture, measured in f-stops (like f/2.8, f/8, f/16), controls the lens opening size, influencing depth of field and light intake. A wider aperture (smaller f-number) creates a shallow depth of field, ideal for isolating subjects, while a narrower aperture (larger f-number) yields greater depth of field, keeping more of the scene in focus.
Shutter speed, expressed in seconds or fractions of a second (e.g., 1/60, 1/250, 1 second), determines how long the film is exposed to light. Faster shutter speeds freeze motion, while slower speeds allow more light in but can introduce motion blur. Balancing aperture and shutter speed is crucial for achieving proper exposure, considering the ISO setting and desired creative effect.
Metering Modes Explained (TTL, Center-Weighted)
The Mamiya 645 offers various metering modes to accurately assess light. TTL (Through-The-Lens) metering measures light reflected from the scene after it passes through the lens, providing precise readings. This is the most common and generally reliable mode.
Center-weighted metering prioritizes the light in the center of the frame, gradually decreasing sensitivity towards the edges. This is useful for portraits or subjects centrally located, ensuring proper exposure for the main focus. Understanding these modes allows photographers to tailor exposure to specific shooting situations, achieving optimal results and creative control.
ISO Setting and Exposure Compensation
ISO, or film sensitivity, dictates how responsive the film is to light. The Mamiya 645 allows manual ISO setting, typically ranging from 25 to 3200, depending on the film stock used. Higher ISOs are ideal for low-light conditions but introduce more grain.
Exposure compensation adjusts the meter’s reading, crucial when shooting scenes with extreme brightness or darkness. Use it to override the meter and achieve desired exposure. A positive value brightens, while a negative value darkens the image. Mastering these controls ensures accurate and creative exposure in diverse scenarios.
Focusing and Depth of Field
Achieve sharp images! Learn manual focusing techniques, utilizing the split-image aid, and understand how aperture impacts depth of field for creative control.
Manual Focusing Techniques
Precise focusing is crucial with the Mamiya 645. Begin by composing your shot through the prism finder and observing the focusing screen. Rotate the focusing ring on the lens until the subject appears sharpest. Utilize the split-image rangefinder within the focusing screen; align the two opposing images for accurate focus.
Small adjustments are key – slow, deliberate turns of the focusing ring yield the best results. Practice focusing on subjects at varying distances to develop muscle memory. Remember that depth of field will influence how much of the scene appears acceptably sharp, so consider your aperture setting alongside focusing accuracy.
Utilizing the Split-Image Focusing Aid
The Mamiya 645’s split-image rangefinder is a powerful focusing tool. Located in the center of the focusing screen, it presents a slightly offset image. To achieve sharp focus, rotate the lens’s focusing ring until the split image halves align perfectly, creating a single, cohesive image.
This alignment indicates that your subject is in the plane of critical focus. It’s particularly useful in low light or when focusing on subjects lacking strong contrast. Practice using this aid to quickly and accurately pinpoint sharpness, enhancing the clarity of your medium format images.
Understanding Depth of Field and Hyperfocal Distance
Depth of field (DOF) dictates the area appearing acceptably sharp in your image. It’s influenced by aperture, focal length, and subject distance. Smaller apertures (higher f-numbers) yield greater DOF, ideal for landscapes. Conversely, wider apertures (lower f-numbers) create shallow DOF, perfect for isolating subjects.
Hyperfocal distance is the focus distance yielding maximum DOF. Utilizing it ensures everything from half that distance to infinity appears reasonably sharp. Mastering these concepts allows precise control over image sharpness, enhancing creative expression with your Mamiya 645.
Advanced Features and Functions
Explore creative possibilities! Discover multiple exposures, AE lock for precise control, and the versatility of interchangeable backs for 6×4.5 or 6×7 formats.
Multiple Exposure Capabilities
Unleash your artistic vision with the Mamiya 645’s multiple exposure function. This allows you to superimpose several images onto a single frame, creating surreal and dreamlike effects. To activate this feature, engage the multiple exposure release lever, typically found on the camera body. Each subsequent exposure will then add to the existing image on the film.
Remember to carefully consider your exposure settings with each shot, as the cumulative effect can easily lead to overexposure. It’s often beneficial to underexpose slightly with each individual frame. After completing your desired number of exposures, disengage the release lever to return to normal shooting mode. Experiment with different combinations and subjects to unlock unique creative possibilities!
Using the AE Lock Function
Master challenging lighting situations with the Mamiya 645’s Auto Exposure (AE) Lock. This feature allows you to lock the exposure reading based on a specific area of the scene, independent of the current metering mode. Press and hold the AE Lock button – typically located near the shutter release – while metering your desired portion of the subject.
Maintain pressure on the button, then recompose your shot. The locked exposure settings will remain fixed, ensuring consistent results even as the lighting changes within the frame. Release the button to resume normal metering. This is invaluable for backlit subjects or scenes with high contrast.
Interchangeable Backs: 6×4.5 and 6×7 Formats
Expand your creative options with Mamiya 645’s interchangeable film backs! The system supports both 6×4.5 and 6×7 formats, offering different aspect ratios and image sizes. The 6×4.5 back provides more exposures per roll, ideal for extended shooting, while the 6×7 format delivers larger negatives with exceptional detail.
Ensure the camera back is securely mounted and properly aligned before loading film. Changing backs requires careful handling to avoid light leaks. Each back features its own film advance mechanism and exposure counter, offering flexibility for diverse photographic projects.

Troubleshooting Common Issues
Resolve typical Mamiya 645 problems quickly! This section details solutions for film advance errors, metering inaccuracies, and lens mounting difficulties.
Film Advance Problems
Addressing Film Advance Issues: Encountering difficulties with film advance is a common concern. First, ensure the film leader is correctly engaged onto the take-up spool. If the camera isn’t advancing, check the battery – a weak battery can hinder operation. Inspect the film path for obstructions or damage.
Sometimes, a slightly misaligned film can cause issues; carefully rewind and reload. For persistent problems, examine the mechanical components of the film advance mechanism for any visible wear or blockage. If using a winder, verify its compatibility and proper connection. Remember to avoid forcing the advance lever, as this could cause damage.
Metering Errors and Solutions
Troubleshooting Metering Inaccuracies: Incorrect exposure readings can stem from several sources. Begin by verifying the ISO setting matches your film’s speed. Ensure the lens aperture is correctly set and the shutter speed dial isn’t inadvertently altered. Check the prism finder’s metering window for cleanliness – dust or fingerprints can interfere.
If errors persist, try switching metering modes (TTL or center-weighted) to see if one provides more consistent results. A weak battery can also cause metering malfunctions. Finally, confirm the camera is properly calibrated; professional servicing may be needed for significant or recurring discrepancies.
Lens Mounting and Compatibility Issues
Secure Lens Attachment: When mounting a lens, align the red dots on the lens and camera body. Rotate the lens clockwise until it clicks firmly into place. Incorrect mounting can lead to focusing or metering errors. Ensure no debris is present in the lens mount.
Compatibility Considerations: Mamiya 645 lenses are generally interchangeable within the system, but older lenses may lack autofocus functionality on newer camera bodies. Verify compatibility before purchasing third-party lenses. Adapters may exist for using non-Mamiya lenses, but performance isn’t guaranteed.
Lens Care and Maintenance
Protect your investment! Regular cleaning and careful storage are crucial for maintaining optimal lens performance and longevity within the Mamiya 645 system.
Cleaning Mamiya 645 Lenses
Maintaining pristine optics is vital for image quality. Begin by using a blower to remove loose dust and debris from the lens surface. Follow this with a soft, clean lens brush, gently sweeping away any remaining particles. For fingerprints or smudges, apply a few drops of lens cleaning solution to a microfiber cloth – never directly onto the lens.
Wipe in a circular motion, starting from the center and moving outwards. Avoid excessive pressure. Stubborn marks may require a second, gentle cleaning. Inspect the lens carefully for any remaining residue. Always store lenses with caps securely fastened to prevent dust accumulation and potential scratches. Regular, gentle cleaning will ensure your Mamiya 645 lenses deliver exceptional results for years to come.
Proper Lens Storage
Protect your investment with careful storage practices. Always store Mamiya 645 lenses in a cool, dry place, away from direct sunlight and extreme temperatures. Utilize lens cases or pouches to shield them from dust, moisture, and accidental impacts. Ensure the front and rear lens caps are securely attached before storing.
Consider using a desiccant pack within the storage container to absorb any residual humidity, preventing fungus growth. Avoid storing lenses for extended periods in damp basements or hot attics. Regular inspection of stored lenses is recommended to identify any potential issues early on. Proper storage preserves optical quality and extends lens lifespan.
Avoiding Lens Damage
Protecting your Mamiya 645 lenses is crucial for maintaining image quality. Never force lens mounts; ensure proper alignment before twisting. Avoid dropping or subjecting lenses to strong shocks. When changing lenses, work in a clean environment to prevent dust from entering.
Refrain from touching the lens elements with bare fingers; use a blower or lens brush for cleaning. Shield lenses from harsh weather conditions like rain or sand. Always use a lens hood to protect against accidental impacts and flare. Careful handling minimizes the risk of costly repairs or replacements.
Camera Maintenance and Storage
Preserve your Mamiya 645’s longevity! Regular cleaning, proper battery care, and careful storage in a dry place are essential practices.
Cleaning the Camera Body
Maintaining a pristine camera body is crucial for optimal performance and longevity. Begin by using a soft, dry microfiber cloth to gently wipe away dust and fingerprints. For stubborn smudges, slightly dampen the cloth with a lens cleaning solution – never apply liquid directly to the camera.
Pay particular attention to the film compartment, ensuring no debris remains that could contaminate future film loads. Avoid abrasive cleaners or solvents, as these can damage the finish. The prism finder should also be cleaned with a dedicated lens cloth. Regularly inspect the battery compartment for corrosion and clean as needed. Careful and consistent cleaning will keep your Mamiya 645 looking and functioning its best.
Battery Replacement and Care
Your Mamiya 645 relies on batteries for metering and electronic functions. Always use the recommended battery type – typically AA batteries – to avoid damage. When replacing batteries, ensure correct polarity. Remove batteries if the camera will be stored for an extended period to prevent leakage and corrosion.
Inspect the battery compartment regularly for any signs of corrosion; clean with a dry cloth if necessary. Avoid mixing old and new batteries. Dispose of used batteries responsibly, following local regulations. Keeping spare batteries readily available ensures uninterrupted shooting during important moments. Proper battery care extends the life of both the batteries and your camera.
Long-Term Storage Recommendations
Preparing your Mamiya 645 for extended storage is crucial for maintaining its condition. First, remove the batteries to prevent potential corrosion. Store the camera body and lenses separately in a cool, dry place, away from direct sunlight and humidity. A camera bag or case offers excellent protection.
Release the shutter and advance the film (if loaded) before storage. Consider using desiccant packs within the storage container to absorb any residual moisture. Periodically check the stored equipment for signs of mold or deterioration. Proper long-term storage ensures your Mamiya 645 remains ready for future use.