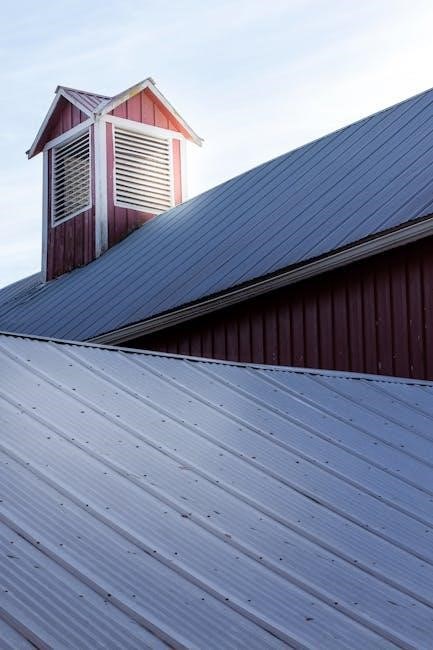
This guide details the process of installing a durable and aesthetically pleasing Colorbond roof‚ covering preparation‚ fixing‚ and finishing steps for a long-lasting result.
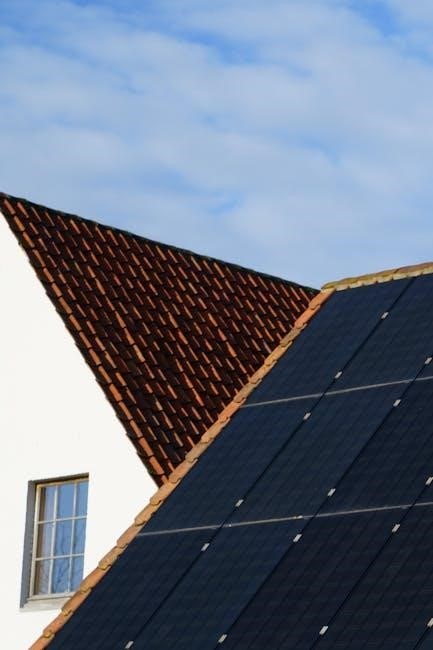
Colorbond roofing is a popular choice for Australian homes and buildings‚ renowned for its durability‚ modern aesthetic‚ and wide color range. Replacing concrete tiles with a Colorbond roof offers significant benefits‚ including reduced weight and enhanced weather resistance. This guide provides a step-by-step approach to installation‚ from initial roof deck preparation to final finishing touches.
Proper installation‚ following manufacturer guidelines‚ is crucial for maximizing the lifespan and performance of your Colorbond roof. Understanding the system – including battens‚ sarking‚ and fixing methods – ensures a secure and watertight result.
Understanding Colorbond Steel
Colorbond steel is manufactured with a base of galvanized steel‚ providing excellent corrosion resistance. This is then coated with a metallic protective layer – zinc/aluminium alloy – and finished with a durable paint layer. The steel base provides strength‚ built to strict accordance with Australian standards.
This multi-layered composition ensures long-term durability‚ even in harsh weather conditions. The Thermatech solar reflectance technology further enhances performance‚ reflecting more of the sun’s heat. Understanding these properties is key to proper handling and installation.
Composition and Durability
Colorbond steel’s durability stems from its unique composition: a galvanized steel base‚ a zinc-aluminium alloy coating‚ and a specialized paint finish. This combination provides exceptional resistance to corrosion‚ chipping‚ and fading‚ even in coastal environments.
The metallic coating protects the steel‚ while the paint layer adds color and further enhances protection. Backed by a 25-year warranty‚ Colorbond offers long-lasting performance‚ making it a reliable roofing material for Australian homes and buildings.
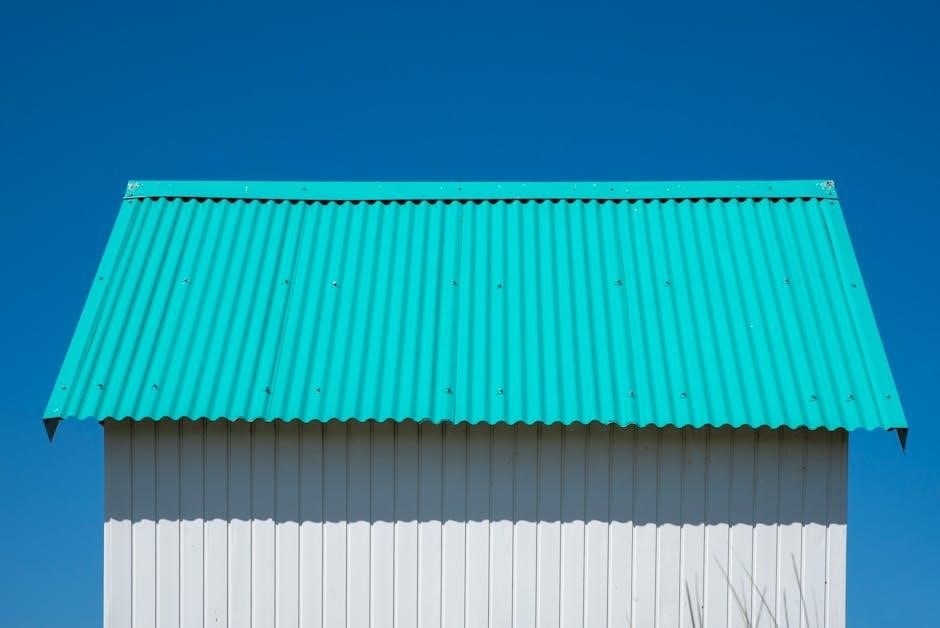
Color Range and Selection
Colorbond roofing boasts an extensive palette of colors‚ catering to diverse architectural styles and personal preferences. Classic choices like Monument‚ Surfmist‚ and Willowbark remain popular‚ while bolder options like Dune and Jasper offer a contemporary aesthetic.
Consider your home’s exterior‚ surrounding landscape‚ and local climate when selecting a color. Thermatech® technology in many colors reflects more solar radiation‚ potentially reducing energy costs. Explore the full range to find the perfect complement to your property.
Safety Precautions
Roof work inherently involves risks; prioritizing safety is paramount. Always conduct a thorough site assessment before commencing any installation. Strict adherence to safety regulations‚ including those concerning working at heights‚ is non-negotiable.
Ensure all personnel are adequately trained and competent in safe roof work practices. Proper fall protection systems‚ like harnesses and anchor points‚ are essential. Be mindful of weather conditions; avoid work during high winds or inclement weather.
Personal Protective Equipment (PPE)
Mandatory PPE is crucial for safeguarding installers during Colorbond roofing projects. This includes a hard hat to protect against falling debris‚ and safety glasses to shield eyes from dust and flying particles. Sturdy‚ non-slip work boots are essential for secure footing on the roof surface.
Gloves protect hands from sharp edges and materials‚ while a full-body harness‚ connected to a secure anchor point‚ prevents falls. Appropriate clothing‚ covering arms and legs‚ minimizes skin exposure.
Working at Heights Safety
Prioritizing safety when working at heights is paramount during Colorbond roof installation. Always utilize a fall arrest system‚ including a full-body harness and secure anchor points‚ inspected before each use. Establish a safe work zone‚ clearly demarcated to prevent unauthorized access below.
Regularly inspect ladders and scaffolding for stability and proper setup. Never work in adverse weather conditions like high winds or rain. Ensure adequate lighting for visibility‚ and communicate effectively with your team.
Tools and Materials Required
Successful Colorbond roof installation demands the right tools and materials. Essential tools include a measuring tape‚ chalk line‚ cutting tools (nibblers or shears)‚ drill with appropriate bits‚ and a rivet gun. Materials needed encompass Colorbond sheets‚ battens‚ purlins‚ roofing screws with neoprene washers‚ fixing clips‚ flashing‚ sealants‚ and safety gear.
Don’t forget roof sarking‚ gutters‚ downpipes‚ and potentially insulation. Accurate quantity calculations are crucial to minimize waste and ensure project completion.
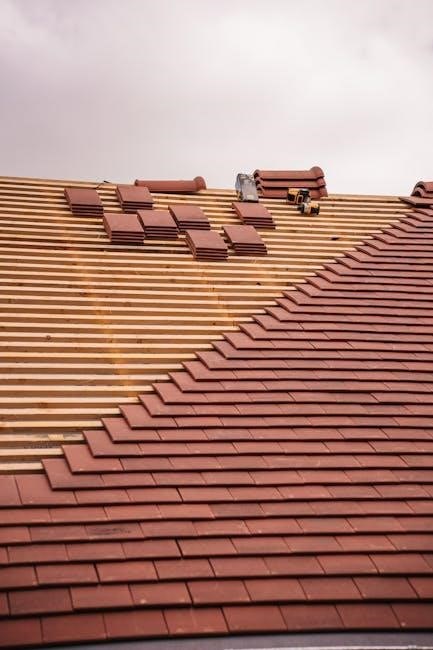
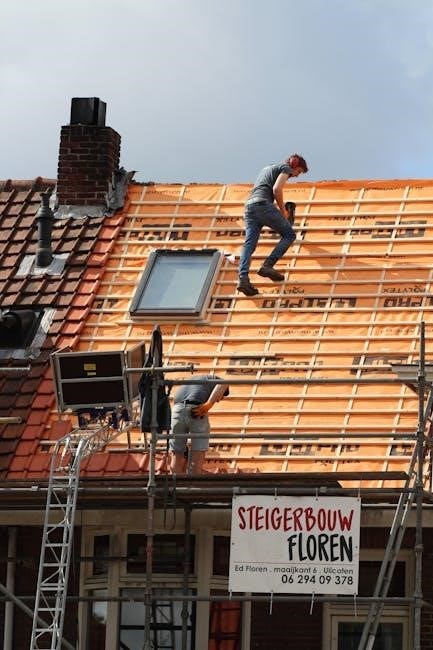
Preparing the Roof Deck
Proper roof deck preparation is fundamental for a secure and long-lasting Colorbond roof. Begin by inspecting the existing structure for rot‚ damage‚ or weakness. Remove any debris‚ old roofing materials‚ and loose nails or screws. Repairing damaged timber is critical; replace rotten sections and reinforce sagging areas to ensure a solid‚ level base.
Ensure the deck is clean‚ dry‚ and structurally sound before proceeding with further installation steps‚ guaranteeing optimal performance.
Inspecting Existing Structure
A thorough inspection of the roof’s existing structure is paramount before any Colorbond installation. Carefully examine rafters‚ battens‚ and decking for signs of rot‚ water damage‚ or structural compromise. Look for sagging‚ warping‚ or loose connections.
Probe timber with a screwdriver to identify soft spots. Address any weaknesses immediately; a compromised structure will invalidate warranties and lead to future issues. Document findings for repair planning.
Repairing Damaged Timber
Addressing damaged timber is crucial for a secure Colorbond roof. Replace rotted or weakened rafters and battens with appropriately sized‚ treated timber. Secure new timber using approved fasteners‚ ensuring proper alignment and support.
For minor damage‚ timber consolidation treatments may suffice‚ but always prioritize complete replacement for structural integrity. Reinforce decking where necessary‚ and ensure all repairs meet local building codes and standards before proceeding with installation.
Installing Gutters and Fascias
Properly installed gutters and fascias are essential for water management and roof aesthetics. Begin by securely fixing the fascia boards‚ ensuring they are level and plumb. Attach gutters using appropriate brackets and fixings‚ maintaining a consistent fall towards the downpipes.
Seal all joins and seams with a high-quality sealant to prevent leaks. Ensure compatibility between gutter materials and Colorbond roofing to avoid corrosion issues‚ guaranteeing efficient water drainage.
Installing Battens and Purlins
Battens and purlins form the structural support for Colorbond roofing‚ demanding precise installation. Horizontal battens‚ typically 40-75mm‚ are fixed directly to the rafters‚ providing a secure base. Ensure consistent spacing‚ dictated by the Colorbond sheet profile and span requirements.
Use corrosion-resistant fixings to prevent future issues. Accurate alignment is crucial for a smooth‚ even roofline‚ contributing to the overall structural integrity and aesthetic appeal.
Spacing and Alignment
Precise spacing and alignment of battens are paramount for a successful Colorbond installation. Spacing depends on the roof’s pitch‚ sheet profile‚ and wind load requirements – consult manufacturer specifications. Typically‚ spacings range between 600mm and 900mm.
Use a string line or laser level to ensure battens are perfectly straight and aligned‚ creating a consistently level surface for the roofing sheets. This prevents sheet distortion and ensures proper water runoff.
Fixing Methods for Battens
Securely fixing battens to the roof structure is crucial for supporting the Colorbond sheets. Common methods include using timber screws or nails‚ ensuring they penetrate sufficiently into the rafters or trusses. Pre-drilling is recommended to prevent splitting the timber.
Consider using specialized batten fasteners designed for roofing applications‚ offering enhanced holding power. Ensure fixings are corrosion-resistant to withstand weather conditions and maintain structural integrity over time.
Roof Sarking Installation
Installing roof sarking creates a vital secondary layer of protection beneath the Colorbond sheets. This acts as a thermal barrier‚ reducing heat transfer and improving energy efficiency within the building. It also provides a safeguard against water ingress‚ should any moisture penetrate the roofing material.
Overlap sarking sheets appropriately‚ following manufacturer’s guidelines‚ and secure them with staples or specialized roofing nails. Ensure a snug fit to maximize its effectiveness and prevent drafts.
Cutting Colorbond Sheets
Precise cutting is crucial for a neat and watertight Colorbond roof installation. Always measure and mark sheets carefully‚ accounting for overlaps and waste. Utilize specialized cutting tools like shears or a nibbler‚ avoiding abrasive blades that create heat and damage the protective coating.
Wear appropriate safety gear‚ including gloves and eye protection‚ when cutting. Support the sheet adequately to prevent bending or distortion during the cutting process‚ ensuring clean‚ straight lines.
Measuring and Marking
Accurate measurements are paramount before cutting Colorbond sheets. Begin by precisely measuring the roof area‚ factoring in eaves‚ rakes‚ and any roof penetrations. Transfer these measurements onto the sheets using a permanent marker or chalk line‚ ensuring clear and visible lines.
Always double-check your measurements before cutting‚ and account for any necessary overlaps as specified in the installation guidelines. Precise marking minimizes waste and ensures a proper fit.
Safe Cutting Techniques
Cutting Colorbond requires caution to avoid injury and material damage. Utilize specialized cutting tools like shears or a nibbler designed for metal roofing; abrasive blades can create hazardous swarf. Always wear safety glasses and gloves during the cutting process.
Support the sheet adequately to prevent bending or distortion‚ and cut in a controlled manner. Avoid creating burrs‚ and deburr edges immediately after cutting for safe handling and installation.
Installing Colorbond Roof Sheets
Proper installation ensures weather tightness and longevity. Begin by carefully lifting sheets into position‚ ensuring correct overlap according to manufacturer’s specifications – typically one full corrugation. Secure sheets using appropriate fixings‚ starting at the eaves and working upwards‚ maintaining a consistent fixing pattern.
Walk carefully on installed sheets‚ stepping on high points of the corrugations to avoid damage. Ensure sheets are straight and aligned before final fixing‚ creating a visually appealing and structurally sound roof.
Overlap and Fixing Patterns
Correct overlap is crucial for weatherproofing; Typically‚ a one-corrugation overlap is standard‚ ensuring water shedding. Fixing patterns depend on wind loads and roof pitch; consult local building codes and manufacturer guidelines. Generally‚ fixings are placed at every second corrugation along the edges and at every third corrugation in the field.
Maintain consistent spacing for even load distribution and prevent sheet distortion. Use appropriate washers to ensure watertight seals around fixings‚ maximizing roof performance.
Using Appropriate Fixings
Selecting the right fixings is paramount for a secure and long-lasting Colorbond roof. Use specifically designed Colorbond screws with neoprene washers to prevent water ingress and accommodate thermal expansion. Avoid using fixings that can corrode or react with the steel‚ compromising the roof’s integrity.

Screw length must penetrate the supporting structure adequately‚ typically through battens and into the rafters. Ensure fixings are tightened correctly – not too loose‚ nor over-tightened‚ to avoid damage.
Fixing Clips and Screws
Properly installed fixing clips and screws are crucial for a weather-tight and durable Colorbond roof. Clips secure the sheets to the battens‚ allowing for thermal movement‚ while screws provide a firm‚ lasting connection. Different clip types suit various roof profiles and wind zones.
Always use screws specifically designed for Colorbond steel‚ featuring neoprene washers. Correct screw placement‚ following manufacturer guidelines‚ prevents sheet buckling and ensures optimal performance.
Types of Fixing Clips
A variety of Colorbond fixing clips cater to different roof designs and wind load requirements. Common types include dish clips‚ which offer broad support‚ and shoulder clips‚ designed for specific profiles. Button clips provide a streamlined appearance‚ while locating clips ensure precise sheet alignment.
Choosing the correct clip depends on the roof pitch‚ sheet profile‚ and regional wind conditions. Always consult the manufacturer’s specifications for appropriate clip selection and spacing to guarantee structural integrity.
Correct Screw Placement
Precise screw placement is crucial for a secure and watertight Colorbond roof installation. Screws should be driven into the purlins at a 90-degree angle‚ using appropriate self-drilling screws with neoprene washers to prevent leakage.
Follow the manufacturer’s recommended screw spacing‚ typically dictated by wind load zones and sheet thickness. Avoid over-tightening‚ which can damage the sheets‚ and ensure screws penetrate sufficiently into the purlins for a firm hold.
Ridge and Hip Cappings
Ridge and hip cappings provide a neat and weatherproof finish to the roof’s apex and sloping edges. These are typically made from Colorbond steel to match the roof sheets‚ ensuring aesthetic consistency and durability.
Install cappings using appropriate fixings‚ overlapping joints correctly to prevent water ingress. Proper sealing with a compatible sealant is essential‚ particularly at joins and where the cappings meet the roof sheets‚ guaranteeing a long-lasting‚ secure roofline.
Gutter Guard Installation
Installing gutter guards prevents leaf litter and debris from clogging gutters‚ maintaining efficient water flow and preventing potential water damage to the building’s structure. Several types of gutter guards are available‚ including mesh‚ foam‚ and brush types.
Select a guard compatible with your gutter system and install according to the manufacturer’s instructions‚ ensuring a secure fit. Regular inspection and cleaning of gutter guards are still recommended for optimal performance and longevity.
Flashings and Sealants
Proper flashing and sealant application are crucial for a watertight Colorbond roof‚ particularly around roof penetrations like chimneys‚ vents‚ and in valley areas. Flashings‚ typically made of Colorbond steel‚ divert water away from vulnerable points.
Use a high-quality‚ flexible sealant compatible with Colorbond steel to create a watertight seal between the flashing and the roof sheet. Ensure all overlaps are correctly sealed to prevent leaks and maintain the roof’s integrity over time.
Around Chimneys and Vents
Flashing around chimneys and vents requires meticulous attention to detail to prevent water ingress. Begin by carefully cutting and shaping Colorbond flashing to conform to the chimney or vent’s profile.
Step flashing‚ integrated with counter flashing‚ is commonly used. Apply a generous bead of compatible sealant beneath each flashing piece and secure it with appropriate fixings. Ensure the flashing extends sufficiently up the chimney or vent to effectively divert water away from the roof structure‚ guaranteeing a durable‚ weatherproof seal.
Valley Flashings
Proper valley flashing is crucial for directing water flow and preventing leaks in roof valleys. Install closed valley flashings‚ fabricated from Colorbond steel‚ ensuring they overlap the roof sheets on either side by a minimum of 150mm.
Secure the flashing with appropriate fixings and a waterproof sealant along the edges and seams. Open valleys require careful detailing with half-round flashings‚ ensuring a tight fit and effective water channeling. Regular inspection and maintenance of valley flashings are essential for long-term roof integrity.
Insulation Installation
Installing roof insulation beneath the Colorbond sheets significantly enhances thermal comfort and energy efficiency. Commonly used options include polyester or glasswool batts‚ or reflective foil insulation.
Ensure the insulation is properly fitted between the rafters or purlins‚ avoiding compression for optimal performance. A vapor barrier may be necessary in colder climates to prevent condensation. Correct insulation installation minimizes heat transfer‚ reducing energy costs and creating a more comfortable indoor environment throughout the year.
Colorbond Roofing Warranties
Bluescope Steel‚ the manufacturer of Colorbond‚ provides comprehensive warranties on their products‚ offering peace of mind to homeowners. These warranties typically cover corrosion resistance and color fade for a specified period;
Warranty duration varies depending on the specific Colorbond product and the environment. Proper installation‚ adhering to manufacturer guidelines‚ is crucial for warranty validity. Maintaining records of installation and any maintenance performed is also recommended for claim purposes.
Handling and Storage of Colorbond Sheets
Proper handling and storage are vital to prevent damage to the protective coating of Colorbond sheets. Sheets should be stored flat on a level‚ dry surface‚ protected from the elements and direct sunlight.
Avoid stacking sheets directly on the ground; use timber skids. When lifting‚ use appropriate equipment to prevent bending or scratching the surface. Careful handling minimizes the risk of compromising the roof’s longevity and warranty coverage‚ ensuring a pristine finish.

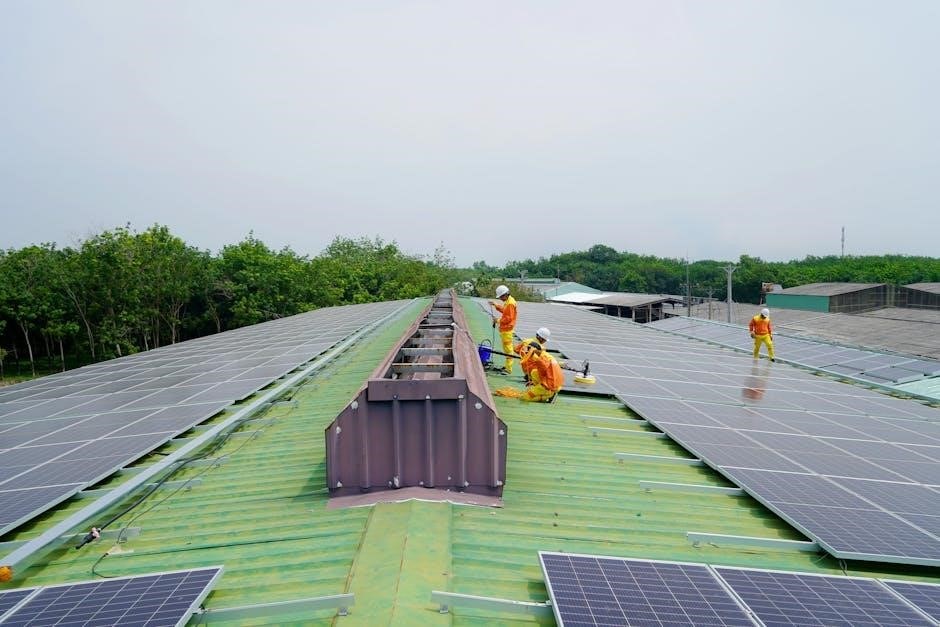
Walking Loads and Roof Maintenance
Colorbond roofs are durable‚ but understanding walking loads is crucial for safety and preventing damage. Generally‚ walking should be minimized and confined to purlin locations‚ utilizing appropriate footwear to distribute weight.
Regular maintenance‚ like clearing debris from gutters and inspecting fixings‚ extends the roof’s lifespan. Avoid abrasive cleaners and sharp objects. Periodic inspections identify potential issues early‚ ensuring continued weather protection and maintaining the roof’s aesthetic appeal for years to come.
Thermatech Solar Reflectance Technology
Colorbond’s Thermatech® technology significantly enhances solar reflectance‚ reducing heat transfer into your building and lowering cooling costs. This innovative coating reflects more of the sun’s energy‚ keeping interiors cooler and more comfortable‚ particularly during warmer months.
Thermatech® not only improves energy efficiency but also contributes to a more sustainable building design. It’s a standard feature across the Colorbond range‚ offering long-term performance and environmental benefits without compromising durability or aesthetics.
Common Installation Errors to Avoid
Incorrect batten spacing is a frequent error‚ leading to sheet deflection and potential water leaks. Insufficient fixing‚ using the wrong fixings‚ or over-tightening screws also compromises roof integrity. Failing to properly overlap sheets or neglecting correct flashing details around penetrations are critical mistakes.
Avoid walking directly on installed sheets‚ as this can cause damage. Ensure adequate ventilation under the roof and always follow manufacturer’s guidelines for optimal performance and longevity.