Understanding shirt measurements is crucial for a comfortable and stylish fit, ensuring garments complement your body shape.
Various brands utilize differing size charts, necessitating accurate self-measurement for optimal results.
Why Accurate Measurements Matter
Precise shirt measurements are paramount to avoiding the frustration of ill-fitting clothing. A well-fitted shirt enhances your appearance and boosts confidence, while a poorly sized one can be uncomfortable and unflattering. Relying solely on generic size labels (Small, Medium, Large) is often insufficient, as variations exist between manufacturers – as seen with O’Neill’s specific sizing.
Accurate measurements ensure you select the correct size, minimizing returns and saving time. Considering factors like chest, shoulder, and sleeve length (especially for button-downs) is vital. Furthermore, understanding your body shape and how different shirt styles fit is key. Ignoring these details can lead to shirts that are too tight, too loose, or disproportionate. Ultimately, investing a few minutes in accurate measurement yields a significantly improved clothing experience.
Understanding Standard Sizing
Standard shirt sizing aims to categorize garments based on body dimensions, though consistency remains a challenge. Generally, sizes progress from XS to 5XL, correlating with increasing chest and waist measurements. However, these are broad guidelines; a “Medium” from one brand may differ significantly from another. US size charts often provide a starting point, but variations exist, particularly when comparing to European or Asian sizing systems.
It’s crucial to recognize that standard sizing doesn’t account for individual body types. Factors like shoulder width, back length, and arm length influence fit. Size charts, like those for polo shirts detailing chest, back length, and sleeve measurements, offer more specific guidance. Always consult a brand’s specific chart before purchasing, and be prepared to adjust based on your unique measurements.

Mens Shirt Measurements
Accurate measurements for men’s shirts involve chest, shoulder, sleeve length, back length, waist (for some styles), and neck circumference, ensuring a proper fit.
Chest Measurement
To obtain an accurate chest measurement, stand naturally with your arms relaxed at your sides. Use a flexible measuring tape and wrap it around the fullest part of your chest, keeping the tape level and snug, but not tight.
Ensure the tape measure goes under your armpits and across your shoulder blades. Breathe normally during the measurement process; do not inhale deeply or exhale completely.
Record the measurement in inches or centimeters. For a more precise fit, consider whether you prefer a looser or more fitted style when selecting your shirt size.
A typical small size has a chest measurement around 52 inches, while medium is approximately 54 inches. Larger sizes, like XL, can range up to 86-95 inches, as indicated in O’Neill’s size chart.
Remember that chest measurements are a primary factor in determining the correct shirt size.
Shoulder Measurement
Accurately measuring your shoulder width is vital for a well-fitted shirt, impacting how the garment drapes and feels. To begin, find the outer edge of one shoulder – the point where your shoulder slope meets your arm.
Then, measure across your back to the outer edge of the opposite shoulder. Keep the measuring tape straight and level, following the natural curve of your shoulders.
This measurement isn’t about the seam of a shirt, but your actual shoulder bone width. A small shirt typically has a shoulder measurement around 46 inches, while a medium is approximately 46.5 inches.
Ensure the tape is snug but not constricting. Proper shoulder fit prevents pulling or bunching, contributing to overall comfort and a polished appearance. Consider this alongside chest measurements for the best result.
Sleeve Length Measurement
Determining the correct sleeve length ensures a proportionate and comfortable fit, impacting the overall aesthetic of your shirt. Begin by bending your elbow slightly – approximately 90 degrees.
Then, measure from the center back of your neck, over your shoulder, and down your arm to the wrist bone.
Keep the measuring tape straight and avoid pulling it too tightly. Sleeve length is often indicated in inches. A typical sleeve length for a medium-sized shirt is around 33-34 inches, but this varies significantly.
Consider whether you prefer your sleeves to fall at your wrist, slightly above, or covering part of your hand. Accurate sleeve length prevents sleeves from being too short or excessively long, enhancing your style.
Back Length Measurement
Accurately measuring back length is vital for achieving a well-fitted shirt, preventing issues like a shirt being too short or bunching awkwardly. Start at the prominent bone at the base of your neck – the C7 vertebra.
Measure straight down your back to the desired shirt length. This is typically where you want the hem to fall, often around your hip bone or slightly below. Ensure the measuring tape remains straight and parallel to your spine.
A standard back length for a men’s medium is approximately 30-31 inches, but individual preferences and body proportions vary. This measurement impacts the overall silhouette and comfort of the shirt.
Waist Measurement (for some styles)
Waist measurement is particularly important for fitted or tailored shirt styles, such as some polo shirts or button-down shirts designed for a slimmer silhouette. Locate your natural waistline – typically the narrowest part of your torso, or where you naturally bend when standing sideways.
Measure around your waist, keeping the tape measure comfortably loose, not tight. Exhale normally while taking the measurement. For shirts with a more relaxed fit, your waist measurement might not be as critical, but it’s still useful for ensuring a comfortable and flattering fit. A typical men’s medium waist measurement falls around 43 inches (half measure), but this varies significantly.
Neck Measurement (for button-down shirts)
Neck measurement is paramount when selecting button-down shirts, as the collar directly impacts comfort and appearance. Wrap a measuring tape around the base of your neck, where the collar would naturally sit. Ensure the tape is snug but not constricting; you should be able to comfortably slide a finger underneath.
Maintain a level tape measure, avoiding tilting upwards or downwards. Round up to the nearest half-inch if your measurement falls between sizes. A typical neck size for a men’s small is around 15.5 inches, but this varies. Accurate neck measurement prevents a collar that’s too tight or too loose, ensuring a polished look.

Womens Shirt Measurements
For women’s shirts, key measurements include bust, waist, hips, and shoulder-to-hem length, ensuring a flattering and comfortable fit for diverse body types.
Bust Measurement
To accurately measure your bust, wear a well-fitting, unpadded bra. Stand naturally with your arms relaxed at your sides. Wrap a measuring tape around the fullest part of your bust, ensuring the tape is level all the way around your back.
Do not pull the tape too tightly, or compress the bust; it should be a comfortable, natural fit. Record the measurement in inches or centimeters. For women with larger busts, it’s often helpful to have someone assist with this measurement to ensure accuracy.
This measurement is vital for determining the correct shirt size, particularly for fitted styles or blouses. Refer to the brand’s specific size chart, as bust measurements can vary significantly between manufacturers. A proper bust measurement prevents gapping or tightness across the chest area, contributing to a more flattering silhouette.
Waist Measurement
For an accurate waist measurement, stand relaxed and breathe normally. Locate your natural waistline – typically the narrowest part of your torso, usually about an inch above your belly button. Wrap a measuring tape around your waist, ensuring it’s snug but not constricting.
The tape should be level all the way around, and parallel to the floor. Avoid sucking in your stomach or extending your chest. Record the measurement in inches or centimeters. This measurement is particularly important for shirts with a defined waist, such as fitted blouses or wrap tops.
Consult the specific brand’s size chart, as waist measurements can differ. A correct waist measurement ensures the shirt fits comfortably and flatters your figure, avoiding a too-tight or loose fit.
Hip Measurement
To accurately measure your hips, stand with your feet together and your weight evenly distributed. Locate the fullest part of your hips and buttocks – this is where you’ll place the measuring tape. Ensure the tape measure is level around your body, parallel to the floor.
Wrap the tape snugly, but not tightly, around your hips, and exhale normally. Avoid squeezing or pulling the tape too tight, as this will result in an inaccurate measurement. Record the measurement in inches or centimeters.
This measurement is crucial for shirts and tops that are fitted around the hip area, like tunic styles or those with a flared silhouette. Refer to the brand’s size chart for specific hip measurements corresponding to each size.
Shoulder to Hem Length
Measuring shoulder to hem length determines the overall vertical fit of a shirt. Begin by locating the highest point of your shoulder – where a shirt seam would typically sit. Then, measure straight down your back to where you desire the hemline to fall.
Keep the measuring tape relatively straight, avoiding curves. This measurement is particularly important for tunic-style shirts, oversized fits, or those you want to wear with leggings.
Consider your body proportions and preferred style when deciding on the hem length. Compare your measurement to the brand’s size chart to ensure the shirt will achieve the desired look and coverage. A longer length offers more coverage, while a shorter length can be more flattering for certain body types.
Shirt Size Charts by Brand
Brand sizing varies significantly; consulting specific charts—like O’Neill’s—is essential for accurate fit.
Utilize these resources to navigate inconsistencies and find your perfect size.
O’Neill Mens Shirt Size Chart
O’Neill provides a detailed sizing guide for their men’s shirts, catering to a broad range of body types. Their chart typically includes measurements for chest, waist, and shoulder width, alongside corresponding sizes from XS to XL and beyond. For example, an XS size generally fits a chest circumference of 57-64 cm and a height of 170-175 cm.
Moving up the scale, a size Small accommodates a chest of 61-70 cm and a height of 173-178 cm. Medium shirts are designed for a 70-77 cm chest and 175-180 cm height, while Large fits a 77-86 cm chest and 178-183 cm height. Extra Large shirts are tailored for individuals with an 86-95 cm chest and a height of 180-185 cm.
It’s important to note that these are general guidelines, and individual styles may vary slightly. Always refer to the specific size chart available on the O’Neill website or product page for the most accurate information. Considering these measurements will help ensure a comfortable and well-fitted O’Neill shirt.
General US Size Chart for Mens Shirts
A standard US men’s shirt size chart offers a baseline for finding a good fit, though variations exist between brands. Small shirts typically suit a chest measurement of 36-38 inches, with a sleeve length around 32-33 inches. Medium shirts generally fit chests of 38-40 inches and sleeves of 34-35 inches.
Large shirts accommodate chests measuring 40-42 inches, paired with 35-36 inch sleeves. Extra-Large shirts are designed for 42-44 inch chests and 36-37 inch sleeves. For larger sizes, XL shirts fit 44-46 inch chests and 37-38 inch sleeves, while 2XL suits 46-48 inch chests and 38-39 inch sleeves.
Remember, these are approximate; always check the brand’s specific chart. Back length and shoulder width also contribute to fit. Using a tape measure and comparing your measurements to the chart is crucial for selecting the correct size and achieving a comfortable, flattering look;

Taking Your Own Measurements
Accurate self-measurement, utilizing a flexible tape measure, is vital for optimal shirt fit. Seeking assistance from another person can improve precision and reliability.
Tools You’ll Need
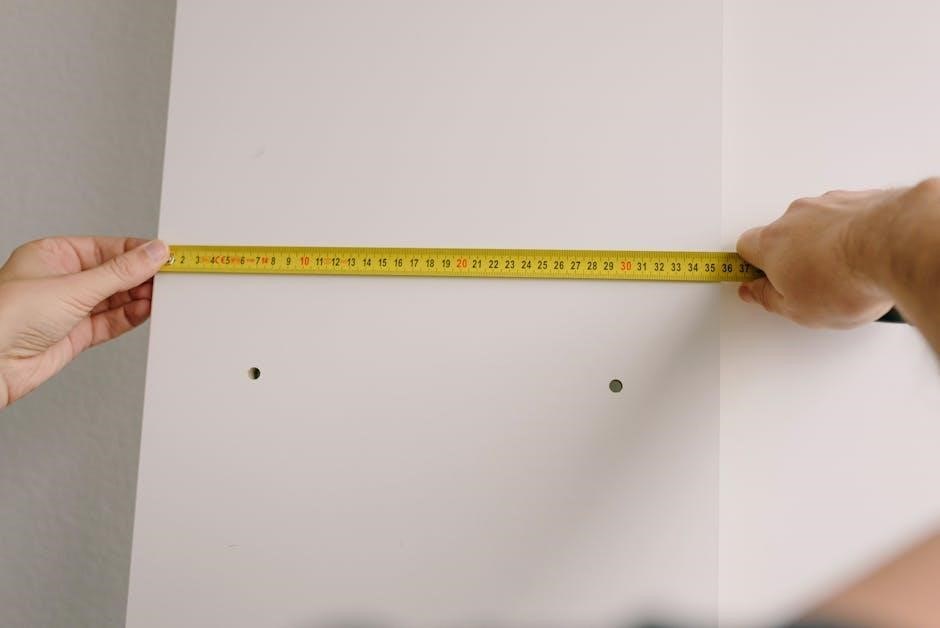
Embarking on accurate shirt measurements requires minimal, readily available tools. A flexible fabric tape measure is absolutely essential; avoid metal measuring tapes, as they lack the necessary give to conform to body contours. A full-length mirror is incredibly helpful, allowing you to observe your posture and ensure the tape measure remains level during the process.
Having a friend or family member assist can significantly improve accuracy, particularly for measurements taken on the back. A pen and paper (or a digital note-taking device) are needed to record your measurements as you take them. Finally, wearing properly fitting, lightweight clothing – or even just undergarments – during measurement will yield the most precise results, avoiding interference from bulky layers.
Getting Help with Measurements
While self-measurement is achievable, enlisting assistance often yields more accurate results, especially for areas difficult to reach or view independently. A friend or family member can ensure the tape measure remains level during back measurements, a common source of error. They can also verify proper arm positioning for sleeve length and confirm a relaxed, natural posture.
If consistent accuracy is paramount, consider visiting a professional tailor or clothing alterations specialist. They possess the expertise and tools to take precise measurements, accounting for individual body variations. This is particularly beneficial when purchasing custom-made shirts or ordering online from brands with unfamiliar sizing systems. Don’t hesitate to seek expert guidance for a perfect fit!

Converting Between Size Systems
Navigating international sizes requires conversion charts, as US, European, and Asian sizing differ significantly; always double-check before purchasing garments online.
US to European Sizes
Converting US shirt sizes to European sizes isn’t always straightforward, as there isn’t a perfect one-to-one correlation. However, a general guideline can assist in finding the appropriate fit. Typically, a US size Medium translates to a European size 48-50, while a US Large often corresponds to a European 52-54.

It’s important to remember that European sizing tends to run slightly smaller than US sizing. Therefore, when in doubt, it’s often advisable to size up when purchasing from European brands. Always consult the specific brand’s size chart, as variations exist. Consider chest measurements – a US 40-inch chest might equate to a European 102-104cm, influencing the best size selection. Paying attention to these details ensures a better fit and reduces the likelihood of returns.
Asian Sizes vs. US Sizes
Navigating Asian shirt sizes, particularly those from China and other East Asian countries, requires careful attention, as they generally run significantly smaller than US sizes. A US size Large could equate to an Asian XXL or even XXXL. This difference stems from variations in body measurements and sizing standards.
Always prioritize checking the specific garment’s size chart, focusing on chest and shoulder measurements rather than relying solely on the labeled size. Asian sizes often list measurements in centimeters, so conversion may be necessary. It’s generally recommended to order at least two sizes up from your usual US size, but again, the chart is key. Ignoring this can lead to a drastically undersized shirt, so diligence is crucial for a proper fit.